Turn Your Playwright Tests Into Interactive Tutorials
TL;DR
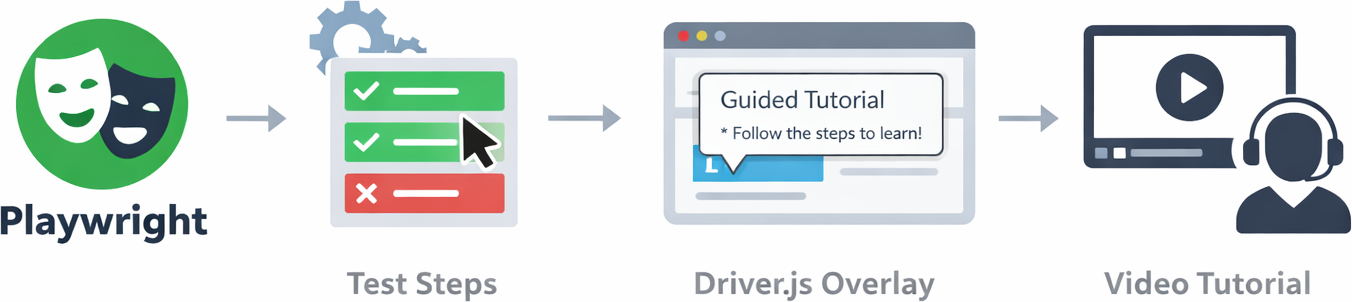
Annotate your Playwright E2E tests with highlight() calls that inject Driver.js overlays at runtime. Set TUTORIAL=1 and your headless tests turn into video-recorded walkthroughs.
Source code: MLgentDev/playwright-tests-as-tutorials
Intro
Your Playwright tests already walk through your app step by step. They click buttons, fill forms, assert outcomes. Meanwhile, your user tutorials describe those same workflows in prose and screenshots that go stale the moment someone renames a button.
I kept thinking: the test is the tutorial. It just doesn't look like one yet.
This post shows how to make Playwright tests double as visual walkthroughs by injecting Driver.js overlays at runtime. When tutorial mode is off, the highlight calls are no-ops. No slowdown, no extra dependencies in CI.
The problem
Tests and tutorials describe the same user workflows, but they live in separate worlds. Tests are written for machines: they run headless, assert correctness, and nobody outside engineering ever sees them. Tutorials are written for humans: screenshots, GIFs, hand-crafted walkthroughs that drift out of date the moment the UI changes.
Keeping both in sync is busywork that nobody enjoys and most teams eventually stop doing.
The idea
Instead of maintaining tutorials separately, annotate your existing Playwright tests with visual highlights. A single environment variable toggles between two modes:
| Normal mode | Tutorial mode | |
|---|---|---|
| Command | npx playwright test | TUTORIAL=1 npx playwright test --headed |
| Highlights | Silent no-ops | Driver.js overlays with popovers |
| Speed | Full speed | slowMo: 500 |
| Video | Off | Auto-recorded |
| CI impact | None | N/A (tutorial mode is local) |
CI sees plain, fast tests. Locally, you set one env var and get a guided tour with video recording.
How it works
The architecture has three layers:
Test file (tests/*.spec.ts)
  │
  │  tutorial.highlight('.new-todo', { title: 'Input', text: 'Type here' })
  │
  ▼
Tutorial class (lib/tutorial.ts)
  │
  │  active=true?  ──no──▶  return (no-op)
  │       │
  │      yes
  │       │
  │  _ensureDriverJs() ── lazy CDN injection
  │       │
  │  page.evaluate() ── create overlay, show popover
  │       │
  │  waitForTimeout() ── keep visible
  │       │
  │  page.evaluate() ── destroy overlay, clean up
  │
  ▼
Playwright config (playwright.config.ts)
  │
  │  TUTORIAL env var → slowMo, video recording, fixture option
The Tutorial class wraps a Playwright Page. When active is false (the default), every highlight() call returns immediately. When active is true, it lazily loads Driver.js from CDN, spotlights the target element, waits for a timeout, and tears down the overlay. All through page.evaluate().
Setting it up
1. The fixture extension
Create lib/fixtures.ts to add a tutorial boolean option driven by the TUTORIAL environment variable:
// lib/fixtures.ts
import { test as base } from '@playwright/test';

export type TestOptions = {
  /** Whether tutorial highlights are active. Driven by TUTORIAL=1 env var. */
  tutorial: boolean;
};

export const test = base.extend<TestOptions>({
  tutorial: [!!process.env.TUTORIAL, { option: true }],
});

export { expect } from '@playwright/test';
Tests import test and expect from this file instead of @playwright/test. This makes the tutorial fixture option available to every test.
2. The Playwright config
In playwright.config.ts, conditionally enable slowMo and video recording when TUTORIAL is set:
// playwright.config.ts
import { defineConfig, devices } from '@playwright/test';
import type { TestOptions } from './lib/fixtures';

export default defineConfig<TestOptions>({
  testDir: './tests',
  reporter: 'html',
  use: {
    trace: 'on-first-retry',

    // Record video when TUTORIAL mode is enabled (full viewport resolution)
    video: process.env.TUTORIAL
      ? { mode: 'on', size: { width: 1600, height: 900 } }
      : 'off',

    // Slow down actions for tutorial demo visibility
    launchOptions: { slowMo: process.env.TUTORIAL ? 500 : 0 },
  },
  projects: [
    {
      name: 'chromium',
      use: {
        ...devices['Desktop Chrome'],
        viewport: { width: 1600, height: 900 },
      },
    },
    // ... other browsers
  ],
});
slowMo: 500 gives viewers time to follow each action. Video is recorded at full viewport size so the output looks sharp.
3. The Tutorial class
The interesting part is lib/tutorial.ts:
// lib/tutorial.ts
import type { Page, Locator, ElementHandle } from '@playwright/test';

const DRIVER_JS_VERSION = '1.4.0';
const DRIVER_CSS_URL = `https://cdn.jsdelivr.net/npm/driver.js@${DRIVER_JS_VERSION}/dist/driver.css`;
const DRIVER_JS_URL = `https://cdn.jsdelivr.net/npm/driver.js@${DRIVER_JS_VERSION}/dist/driver.js.iife.js`;

const DEFAULT_HIGHLIGHT_TIMEOUT = 3000;

export class Tutorial {
  private _page: Page;
  private _injected = false;
  private _active: boolean;

  constructor(page: Page, active: boolean = false) {
    this._page = page;
    this._active = active;

    // Reset injection flag on navigation so Driver.js is re-injected on new pages
    this._page.on('framenavigated', (frame) => {
      if (frame === this._page.mainFrame()) {
        this._injected = false;
      }
    });
  }

  // ...
}
Driver.js is not an npm dependency. It's loaded from jsDelivr the first time highlight() runs, via page.addScriptTag() and page.addStyleTag(). Nothing extra in your package.json.
private async _ensureDriverJs(): Promise<void> {
  if (this._injected) return;

  await this._page.addStyleTag({ url: DRIVER_CSS_URL });
  await this._page.addScriptTag({ url: DRIVER_JS_URL });

  // Wait until the driver global is available
  await this._page.waitForFunction(() => !!(window as any).driver?.js?.driver);

  this._injected = true;
}
The framenavigated listener resets _injected to false whenever the page navigates. Without this, the second highlight() after a navigation would try to use a global that no longer exists.
Each highlight creates a Driver.js instance, stores it on window.__tutorialDriver, waits for the configured timeout, then calls destroy() and cleans up:
await this._page.evaluate(() => {
  const driverObj = (window as any).__tutorialDriver;
  if (driverObj) {
    driverObj.destroy();
    delete (window as any).__tutorialDriver;
  }
});
Writing your first tutorial-test
Here's tests/todomvc.spec.ts, which tests the TodoMVC demo app and produces a guided tutorial at the same time.
Imports and setup
import { test, expect } from '../lib/fixtures';
import { Tutorial } from '../lib/tutorial';

test('add and complete a todo', async ({ page, tutorial: tutorialActive }) => {
  await page.goto('https://demo.playwright.dev/todomvc/#/');
  const tutorial = new Tutorial(page, tutorialActive);
The tutorial fixture option (a boolean from the env var) is destructured as tutorialActive and passed to the Tutorial constructor. One instance per test, created right after page.goto().
Highlighting with CSS selectors
// Highlight the input field
await tutorial.highlight('.new-todo', {
  title: 'New Todo Input',
  text: 'Type your todo item here and press Enter.',
  side: 'bottom',
});
Pass a CSS selector string as the first argument. The popover appears below the element (side: 'bottom'). The title and text fields support HTML.
Highlighting with Playwright locators
// Highlight the newly added todo
await tutorial.highlight(page.getByTestId('todo-item'), {
  title: 'Your Todo',
  text: 'The todo item has been added to the list.',
  side: 'right',
});
You can also pass a Playwright Locator directly. The highlight() method calls waitFor({ state: 'visible' }) on the locator and resolves it to an element handle internally, so you get Playwright's full locator semantics: getByTestId, getByRole, getByPlaceholder, etc.
Interleaving highlights with test actions
The highlight() calls sit between normal Playwright actions. The test stays a real test, with assertions and everything:
// Add a todo
const input = page.getByPlaceholder('What needs to be done?');
await input.fill('Buy groceries');
await input.press('Enter');

// Highlight the newly added todo
await tutorial.highlight(page.getByTestId('todo-item'), {
  title: 'Your Todo',
  text: 'The todo item has been added to the list.',
  side: 'right',
});

// Complete the first todo
const firstTodo = page.getByTestId('todo-item').nth(0);
await tutorial.highlight(firstTodo.getByRole('checkbox'), {
  title: 'Complete',
  text: 'Click the checkbox to mark a todo as done.',
  side: 'right',
});
await firstTodo.getByRole('checkbox').check();

// Verify it's completed
await expect(firstTodo).toHaveClass(/completed/);
In normal mode, highlight() is a no-op and the test runs at full speed. In tutorial mode, each highlight pauses for 3 seconds (configurable via timeout) while the overlay is visible.
Highlighting without a popover
Sometimes you just want to spotlight an element without text:
// Overlay-only highlight (no popover)
await tutorial.highlight('.hero__title');

// Overlay-only with custom timeout
await tutorial.highlight('.hero__title', { timeout: 2000 });
Running it
Normal test run (no highlights, full speed, headless):
npx playwright test --project=chromium
Tutorial mode (overlays visible, slow, headed, video recorded):
TUTORIAL=1 npx playwright test --headed --project=chromium
Run a specific test:
TUTORIAL=1 npx playwright test tests/todomvc.spec.ts --headed --project=chromium
After a tutorial run, videos are saved alongside the HTML report. Open it with:
npx playwright show-report
What you get
If the UI changes, the test breaks, and you fix both the test and the tutorial in one place. Tutorials can't go stale because they are the tests.
Every tutorial run produces a video you can drop into onboarding docs or a README. And since highlight() is a no-op without TUTORIAL=1, your CI pipeline doesn't notice any of it. No extra dependencies, no slowdown. Your app bundle is untouched too, because the overlays are injected by Playwright at test time, not in production code.
This works for any web app with Playwright tests. The Tutorial class doesn't care about your framework. It just needs a Page and CSS selectors or locators pointing at real DOM elements.